Creating a hand-made hair weft is a meticulous and time-consuming process, but it allows for a high degree of customization and quality control. Whether you are a hair stylist, a wig maker, or a DIY enthusiast, understanding how to make a hair weft by hand can be a valuable skill. This guide will provide a comprehensive overview of the process, including materials needed, step-by-step instructions, and tips for achieving professional results.
Introduction
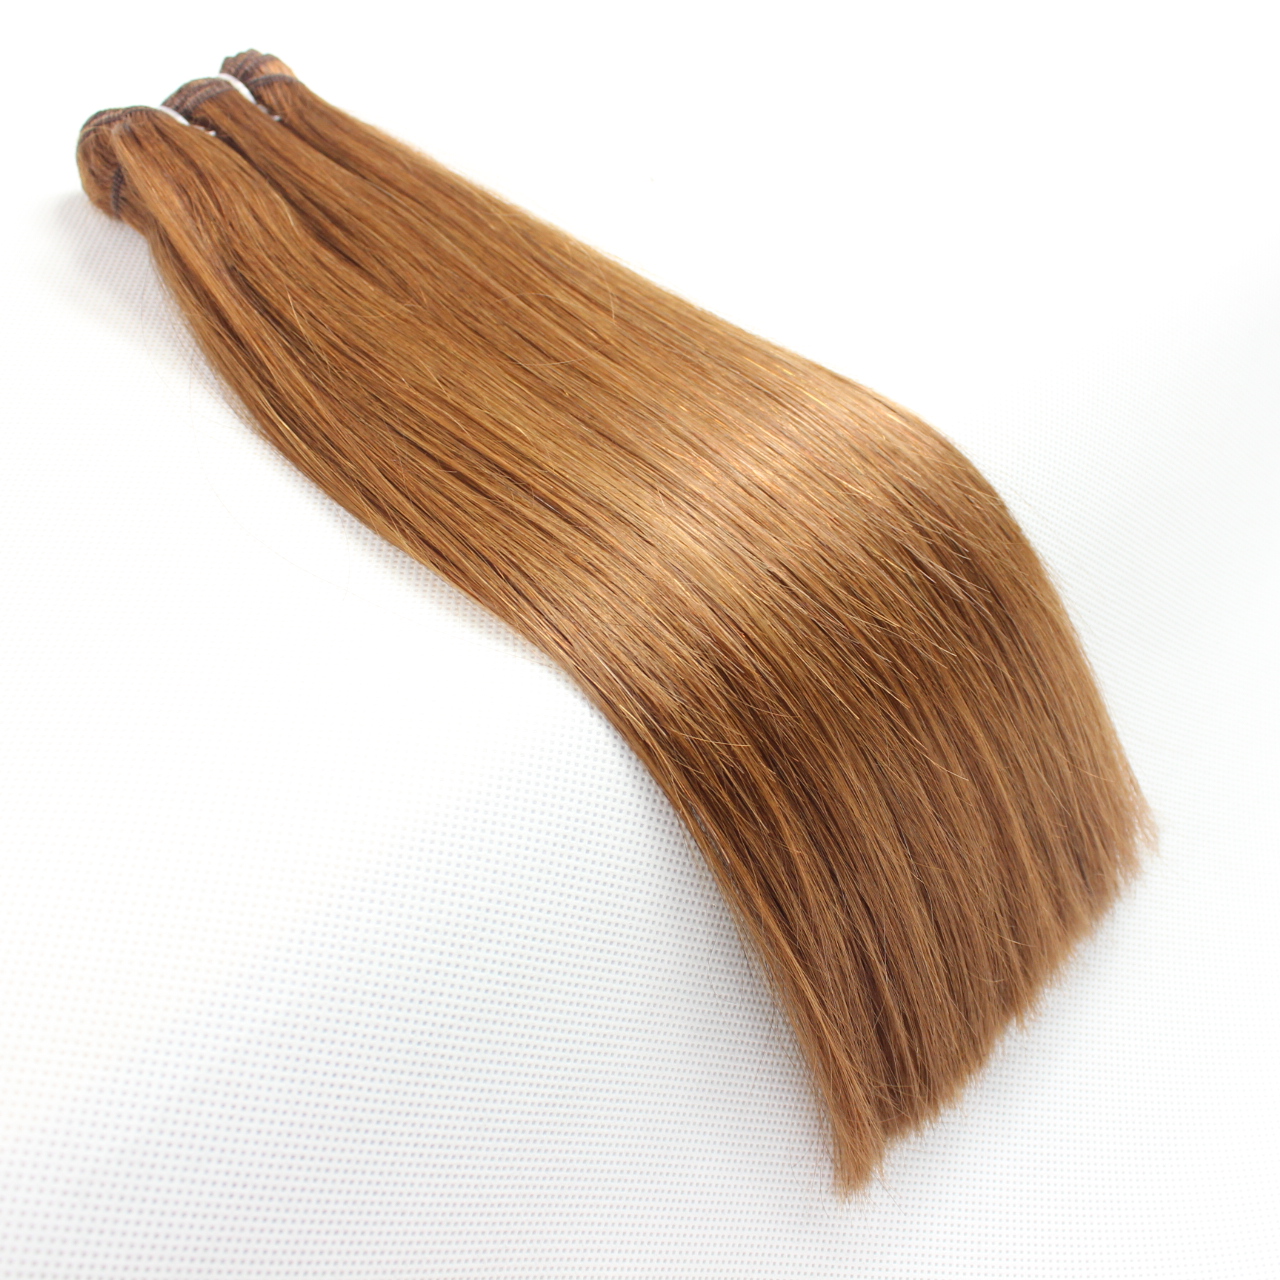
Hair wefts are long strips of hair that are sewn together at the top, creating a “weft.” These wefts can then be sewn or glued onto tracks, wigs, or other hair extensions. Hand-making a hair weft allows you to control the thickness, length, and texture of the hair, ensuring that it meets your specific needs.
Historical Context
Hair extensions have been used for centuries across various cultures. Ancient Egyptians, for instance, used wigs and hair pieces for both aesthetic and practical reasons. In the modern era, hair wefts have become a popular method for adding length, volume, and color to natural hair. The techniques and materials have evolved significantly, allowing for more natural-looking and durable extensions.
Types of Hair Used in Wefting
When making a hair weft, the type of hair you choose is crucial. There are generally two main categories:
Human Hair: This is the most preferred type of hair due to its natural look and feel. It can be styled, colored, and treated like your own hair.
Virgin Hair: Hair that has never been chemically treated. It is the highest quality and can last a long time with proper care.
Remy Hair: Hair where the cuticles are kept intact and aligned in one direction. This reduces tangling and maintains the hair’s quality.
Synthetic Hair: Made from various synthetic fibers, this type of hair is less expensive than human hair but doesn’t offer the same versatility in styling. It can be a good option for temporary or low-cost wefts.
Materials Needed
Creating a hair weft requires specific tools and materials. Here’s a detailed list:
Hair: Choose between human hair or synthetic hair depending on your needs and budget.
Thread: Use a strong, durable thread that matches the color of the hair. Nylon or polyester thread is often preferred for its strength.
Needle: A curved needle is ideal for sewing the weft, but a straight needle can also work.
Weaving Net or Mesh: This helps to stabilize the hair during the wefting process. Look for a fine, strong mesh.
Clips: These are used to hold the hair in place while working.
Comb: A wide-tooth comb is best for detangling the hair.
Scissors: For trimming and cutting hair and thread.
Tape or Glue (Optional): For additional security in the weft, some prefer to use glue or tape at the ends.
Step-by-Step Instructions
Making a hair weft by hand involves several detailed steps. Below, we’ll break down each step comprehensively.
Step 1: Preparing the Hair
Before you begin wefting, prepare the hair by washing, conditioning, and drying it. This ensures that the hair is clean and free of any tangles or knots.
Wash and Condition: Use a gentle shampoo and conditioner to cleanse the hair.
Shampooing: Choose a sulfate-free shampoo to avoid stripping the hair of its natural oils. Apply a small amount to wet hair, gently massaging it into the scalp and hair. Rinse thoroughly.
Conditioning: Apply a moisturizing conditioner to the hair, focusing on the ends. Let it sit for a few minutes before rinsing thoroughly.
Detangle: Use a wide-tooth comb to remove any tangles. Start from the ends and work your way up to the roots to minimize breakage.
Tip: Apply a leave-in conditioner or detangling spray to make this process easier.
Dry: Allow the hair to air dry or use a blow dryer on a low setting. Avoid using high heat as it can damage the hair.
Air Drying: Lay the hair flat on a towel and allow it to dry naturally. This method is less damaging but takes longer.
Blow Drying: If you’re in a hurry, use a blow dryer with a diffuser attachment on a low heat setting.
Step 2: Creating the Weft Base
The base of the weft is created using a weaving net or mesh. This provides a foundation for sewing the hair.
Cut the Net: Cut a strip of weaving net to the desired length of the weft. The width can vary depending on how thick you want the weft to be.
Measuring: Use a ruler or measuring tape to ensure precise measurements.
Secure the Net: Use clips to secure the net to a stable surface, such as a mannequin head or a table. This keeps the net in place while you work.
Mannequin Head: Attach the net to the mannequin head using T-pins or sewing pins.
Flat Surface: If using a table, tape the edges of the net to keep it taut.
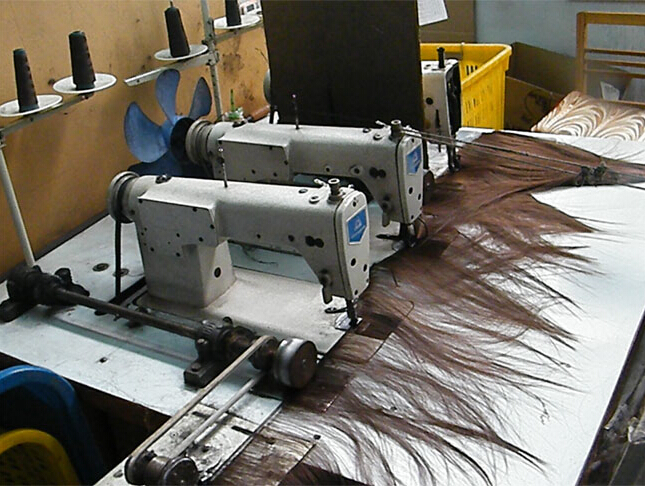
Step 3: Sewing the Hair
Thread the Needle: Use a strong, durable thread that matches the color of the hair. Thread the needle and tie a knot at the end.
Choosing the Thread: Nylon or polyester thread is preferred for its strength and durability.
Knotting: Make a double knot at the end of the thread to ensure it stays secure.
Prepare the Hair: Separate the hair into small, even sections.
Sectioning: Use a comb to divide the hair into sections that are about the same thickness.
Sew the Hair to the Net:
Take a small section of hair and place it on the net.
Insert the needle through the net and pull the thread through, securing the hair to the net.
Repeat this process, sewing the hair in small sections along the length of the net.
Ensure that the stitches are tight and secure, but not too tight to avoid damaging the hair.
Detailed Sewing Techniques
Lock Stitch: This is the most secure method for attaching hair. After inserting the needle through the net and hair, wrap the thread around the needle and pull it tight. This locks the stitch in place.
Backstitch: For added security, use a backstitch. After making a regular stitch, take the needle back through the previous stitch before moving forward. This reinforces the weft.
Step 4: Doubling the Weft (Optional)
For a thicker weft, you can double the hair by folding the weft in half and sewing it together.
Fold the Weft: Fold the weft in half, aligning the edges.
Alignment: Make sure the ends of the weft are perfectly aligned to avoid unevenness.
Sew the Weft: Using the needle and thread, sew the folded weft together, ensuring that the stitches are tight and secure.
Reinforcement: Use a lock stitch or backstitch for added durability.
Spacing: Keep the stitches close together, about 1/4 inch apart, to ensure the weft is secure.
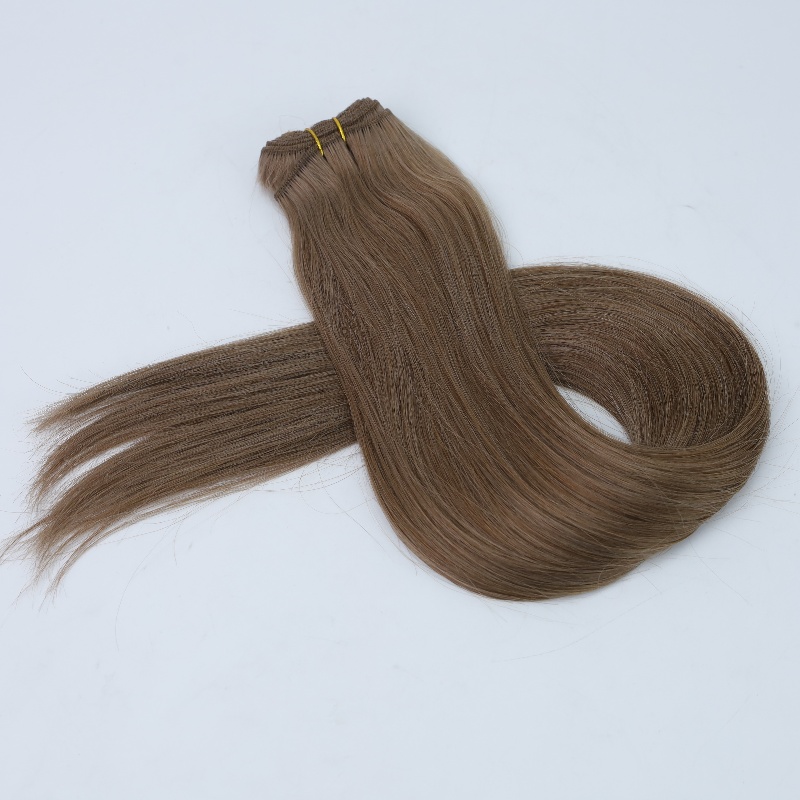
Step 5: Finishing the Weft
Once the hair is securely sewn to the net, finish the weft by trimming any excess hair and securing the ends.
Trim the Hair: Use scissors to trim any uneven or excess hair.
Precision: Use sharp scissors for a clean cut. Trim slowly and carefully to maintain an even length.
Secure the Ends: Tie a knot at the end of the thread to secure it, and trim any excess thread.
Double Knot: For extra security, tie a double knot.
Sealing: Apply a small amount of glue to the knot to prevent it from coming undone.
Optional Sealing: For added security, you can apply a small amount of tape or glue to the ends of the weft.
Tape: Use a small piece of strong adhesive tape to wrap around the ends of the weft.
Glue: Apply a tiny drop of fabric glue or weft glue to the ends. Allow it to dry completely before using the weft.
Tips for Achieving Professional Results
Use High-Quality Materials: The quality of the hair and thread will significantly impact the final product. Invest in high-quality materials for the best results.
Take Your Time: Hand-making a hair weft is a meticulous process. Take your time to ensure that each section of hair is securely sewn.
Practice Makes Perfect: The more you practice, the better your wefting skills will become. Don’t be discouraged if your first few attempts are not perfect.
Maintain Consistent Tension: Keep the tension on the thread consistent to avoid creating loose or tight spots in the weft.
Use a Curved Needle: A curved needle makes it easier to sew through the net and hair, creating a more secure weft.
Avoid Overloading the Weft: Adding too much hair to the weft can make it bulky and difficult to work with. Aim for a balanced, natural look.
Check for Gaps: As you sew, check for any gaps or loose sections. It’s easier to fix these as you go rather than after you’ve finished.
Keep Your Workspace Clean: Hair can easily become tangled or dirty if your workspace is cluttered. Keep your tools and materials organized.
Troubleshooting Common Issues
Hair Shedding
If you notice excessive shedding, it could be due to loose stitches or poor-quality thread. Ensure your stitches are tight and secure, and consider using a stronger thread.
Uneven Weft
An uneven weft can result from inconsistent sectioning of hair or uneven stitching. Make sure to section the hair evenly and maintain consistent stitches.
Bulky Weft
If the weft is too bulky, you might be adding too much hair to each section. Try using smaller sections of hair to achieve a more natural look.
Thread Breaking
If the thread breaks frequently, it might not be strong enough. Consider using a nylon or polyester thread, which is more durable.
Advanced Techniques
Adding Highlights
To add highlights to your weft, use different shades of hair. Sew them in small sections, mixing them in with the base color for a natural look.
Creating Ombre Effects
For an ombre effect, gradually change the hair color as you sew. Start with the darker shade at the top and blend in the lighter shades towards the ends.
Micro beads can be used to attach hair sections instead of sewing. This method requires specialized tools but can create a very secure weft.
Applying a Silk Base
A silk base can be sewn onto the weft to create a more natural look. This technique is often used in high-quality wigs and extensions.
Maintenance and Care
Washing: Wash your wefts gently with sulfate-free shampoo and conditioner. Avoid scrubbing or twisting the hair.
Detangling: Use a wide-tooth comb to detangle the hair, starting from the ends and working your way up.
Drying: Allow the hair to air dry whenever possible. If you must use a blow dryer, use a low heat setting.
Storage: Store your wefts in a cool, dry place. Avoid storing them in plastic bags, as this can cause mold or mildew.
Re-sewing: Over time, the thread may wear out. Re-sew any loose sections to maintain the weft’s integrity.
Conclusion
Making a hair weft by hand is a valuable skill that allows for a high degree of customization and quality control. By following these step-by-step instructions and using high-quality materials, you can create beautiful, durable hair wefts that meet your specific needs. Remember to take your time, practice regularly, and maintain consistent tension for the best results. With patience and practice, you can achieve professional-quality hair wefts that enhance your styling and wig-making projects.
Emeda Hair is committed to ethical sourcing practices, ensuring that all hair used in their extensions is obtained in a responsible and transparent manner. Here’s a detailed look at how Emeda Hair maintains its high ethical standards:
Voluntary Donations: Emeda Hair sources a significant portion of its hair from voluntary donations, particularly from temples in India. Devotees donate their hair as part of religious rituals, and the temples sell this hair to fund charitable activities. Emeda Hair ensures that the proceeds from these sales benefit the local communities, creating a sustainable and ethical supply chain.
Direct Purchases from Individuals: In regions where selling hair is a common practice, Emeda Hair directly purchases hair from individuals. This approach guarantees that sellers receive fair compensation and that the hair is collected with consent. Emeda Hair’s direct engagement with hair sellers helps prevent exploitation and promotes fair trade practices.
Salon Collections: Emeda Hair also collects hair from salons, ensuring that even hair that might otherwise go to waste is utilized. This practice helps reduce waste and supports sustainability within the industry.
Avoidance of Controversial Sources: Emeda Hair explicitly avoids sourcing hair from unethical or controversial sources, including hair from deceased individuals. Their commitment to transparency and ethics is a cornerstone of their brand, and they provide clear information about their sourcing practices to consumers.
Certificate: Emeda Hair is examined with standard organization and healthy hair, click to downlaod the certificate.