Hair toppers have become an essential hair accessory for many people, particularly those with thinning hair, hair loss, or those simply looking to add volume and coverage. Unlike full wigs, hair toppers are smaller, more lightweight, and are specifically designed to cover the crown or top of the head. While you can purchase pre-made toppers, creating your own custom hair topper allows for personalization in terms of size, color, hair type, and density. In this detailed guide, we will explain how to make a hair topper from scratch, covering the materials, tools, and step-by-step instructions required for the process.
Materials and Tools You Will Need:
Hair Wefts or Bundles:
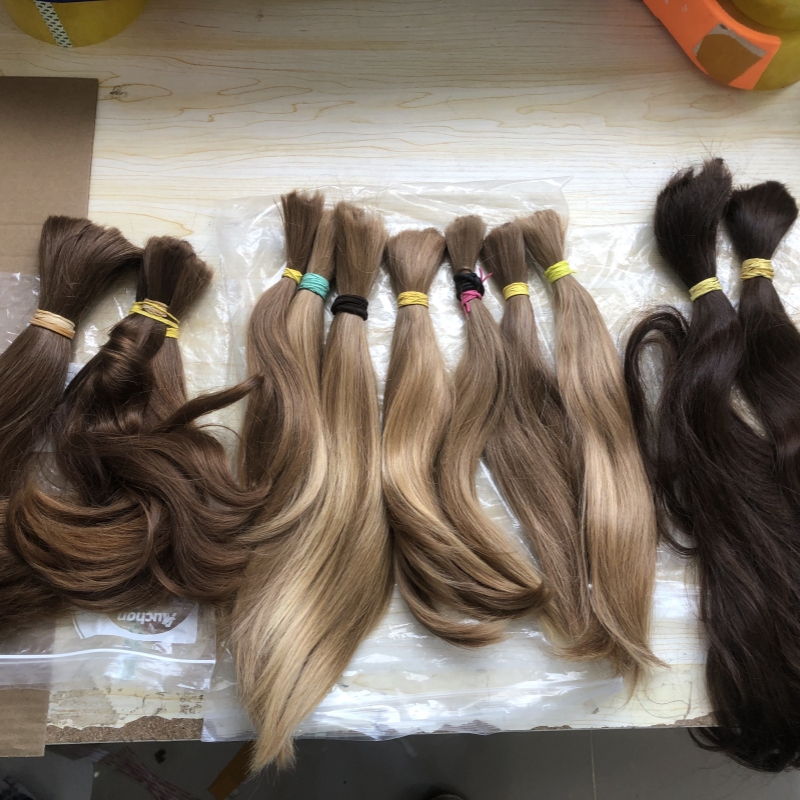
You’ll need human hair wefts or bundles to construct the topper. Opt for 100% Remy human hair for the most natural look and longevity. You can choose the hair color and texture that matches your own, or customize it for a unique style.
Lace or Silk Base:
The base of your hair topper can either be lace or silk. Lace provides breathability and a natural look, while silk offers a more durable, scalp-like appearance. The base size can vary, but it typically ranges from 4×4 inches to 8×8 inches, depending on the area of coverage you need.
Hair Clips:
To secure the topper to your natural hair, you’ll need toupee clips or wig clips. Typically, 3 to 5 clips are enough to secure the topper in place. Ensure the clips are strong and comfortable to prevent slippage or discomfort.
Needle and Thread:
A curved needle and strong nylon thread are essential for sewing the hair wefts onto the base. You’ll also need thread that matches the color of the lace or silk base for an invisible finish.
Adhesive Tape (Optional):
If you prefer not to use clips, you can use double-sided tape or bonding glue to secure the hair topper. This is typically used for more permanent wear and requires careful application.
Scissors:
Sharp scissors are needed for trimming the lace and cutting the hair to the desired length and shape.
Bleach and Dye (Optional):
If the hair wefts or base do not match your scalp or hair color exactly, you may need bleach or dye to adjust the color to match.
Styling Tools:
You may need a curling iron, straightener, and/or heat protectant spray for styling your hair topper once it’s finished.
Step 1: Choose and Prepare the Hair Wefts
Start by selecting high-quality human hair wefts. If you want your hair topper to look as natural as possible, opt for 100% Remy human hair, as the cuticles are aligned and it behaves like natural hair. Remy hair can also be styled, colored, and treated just like your own hair.
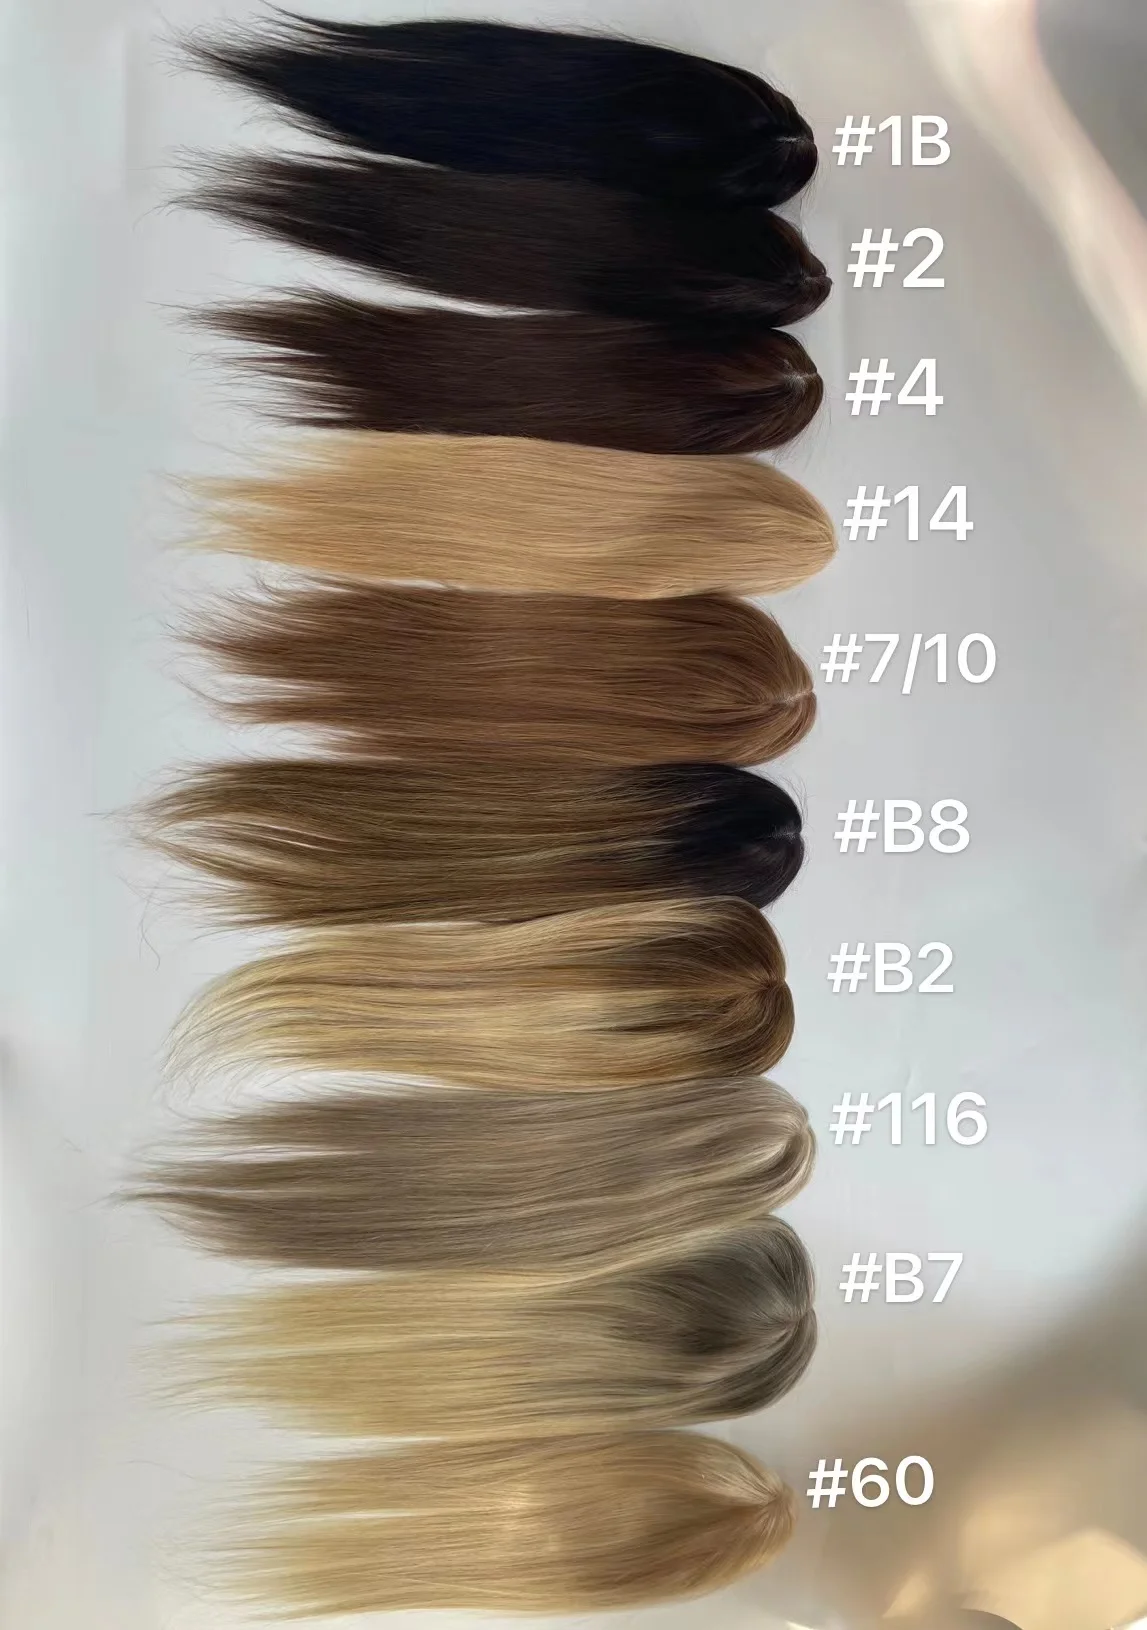
Once you’ve chosen the hair, ensure that the color and texture match your natural hair. If necessary, use a temporary hair dye to make adjustments. Color-matching is critical to ensure that the topper blends seamlessly with your natural hair.
Tip: If your natural hair is multi-dimensional in color, consider blending wefts of different shades to add highlights or lowlights for a more realistic look.
Step 2: Select the Base
The base of your hair topper is the foundation that holds everything together. The choice between lace and silk depends on the finish you want:
Lace Base: A lace base is breathable and light, making it ideal for those who live in warmer climates or plan to wear the topper daily. It also gives a natural look as the lace blends well with the scalp, but it requires more careful sewing.
Silk Base: A silk base is thicker and provides a realistic scalp appearance. Silk bases are more durable and better for individuals seeking a more natural scalp look. However, they can feel heavier than lace.
Cut the base to the desired size. This could be a 4×4 inch square for minimal coverage or as large as 8×8 inches for more coverage. The size will depend on the area you want to cover and your personal preferences.
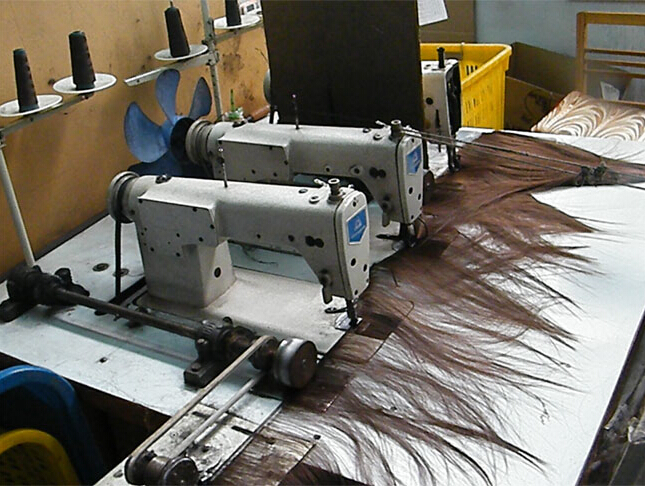
Step 3: Sew the Hair Wefts onto the Base
This is the most important step in constructing your hair topper. Follow these steps carefully to ensure an even distribution of hair and a natural flow:
Prepare the Base:
If you’re using a lace base, you may want to trim the lace to the exact shape of your scalp. Be sure to leave a small border around the edge to allow for sewing.
Sew the First Layer:
Take your needle and thread, and begin sewing the first hair weft onto the perimeter of the base. For this, use a blanket stitch or backstitch to ensure the wefts are securely attached. Start at one edge and work your way around the base, making sure the wefts lay flat.
Create Layers:
Depending on the desired volume, continue sewing additional wefts in rows, working from the outer edge toward the center of the base. The closer the rows are sewn together, the denser the hair topper will appear. Be sure to overlap the wefts slightly for a fuller look.
Top Section:
As you near the top or crown area of the topper, switch to shorter wefts or individual strands for a more natural transition. This will make the hair lay flat and mimic the natural growth pattern of hair from the scalp.
Tip: If using lace, make sure the wefts are sewn close to the lace’s edge to prevent the base from showing when worn.
Step 4: Attach Clips for Security
Once the wefts are sewn in place, it’s time to attach the toupee clips that will secure the topper to your natural hair. Position the clips around the edges of the base in strategic spots, typically at the front, sides, and back. Use a strong nylon thread to sew the clips into place, ensuring they are secure but not overly tight.
For small to medium toppers, 3-4 clips are usually sufficient.
For larger toppers, use up to 5-6 clips for better security.
Make sure the clips open and close smoothly and are positioned in areas that won’t cause discomfort when attached to your scalp.
Step 5: Cut and Style the Hair Topper
Now that the topper is assembled, it’s time to style the hair so it blends seamlessly with your natural hair. Start by trimming the ends of the topper to match your current hairstyle. You can layer the hair to give it more movement or add feathering around the face for a softer look.
If needed, use heat tools to straighten or curl the topper. Always apply a heat protectant spray to protect the hair from damage. You can also use a texturizing spray or mousse to add volume and define the style.
Step 6: Customize the Hairline (Optional)
To make the hair topper look more natural, you may want to create a natural-looking hairline or part. There are a few ways to do this:
Plucking the Hairline: If you’re using a lace base, gently pluck the hair along the hairline to create a more natural look. Be careful not to over-pluck, as this can create bald spots.
Bleaching the Knots: If you used lace for your base, bleaching the knots will make them less visible and create the illusion of hair growing directly from your scalp. To do this, apply a light bleach solution to the knots and leave it on for the recommended time before rinsing.
Creating a Scalp Effect: On a silk base, you can adjust the color of the scalp by applying foundation or powder that matches your skin tone directly to the base to create the appearance of a natural scalp.
Step 7: Try on the Hair Topper
Finally, try on your custom hair topper. Open the clips and secure them to your natural hair, ensuring that the topper sits flat against your scalp. Adjust the placement of the topper so it blends seamlessly with your natural hair.
Check the topper from all angles, ensuring the base is not visible and that the color and texture blend well with your natural hair.
Conclusion
Making your own hair topper allows for complete customization in terms of size, color, density, and style. By following these steps, you can create a high-quality, natural-looking topper that blends seamlessly with your hair and meets your specific needs. Whether you’re seeking more volume, coverage for thinning hair, or a fashion-forward accessory, a custom hair topper is an excellent solution that’s both affordable and practical.
Data of Topper
To provide concrete data and measurements related to hair toppers, let’s break down the specifics of various aspects of a hair topper, including size, hair density, weight, lifespan, and more.
Hair toppers come in different sizes, depending on the level of coverage required. Here are common base sizes used in hair toppers:
Small Base:
Size: 2×3 inches to 4×4 inches.
Coverage: Suitable for those with minimal hair thinning or to add slight volume at the crown.
Medium Base:
Size: 5×5 inches to 6×6 inches.
Coverage: Ideal for those with moderate thinning or a small bald spot on the crown.
Large Base:
Size: 7×7 inches to 8×8 inches.
Coverage: Suitable for those with extensive thinning or larger bald spots, covering the top and sides of the head.
2. Hair Density
Hair density refers to the amount of hair sewn into the topper. This is usually measured as a percentage of normal, natural hair density.
Light Density:
80-100% density.
Suitable for those with fine or thinning hair who want a subtle increase in volume without looking too full.
Medium Density:
110-130% density.
The most common density for hair toppers, offering natural coverage and a fuller appearance without being too heavy.
Heavy Density:
150-180% density.
Provides a more voluminous look and is often chosen by those who prefer thicker, fuller hair.
3. Weight of a Hair Topper
The weight of a hair topper depends on its size, density, and length of hair used. Here’s an approximate guide:
Small Toppers (2×3 to 4×4 inches):
Weight: 50 to 75 grams.
Medium Toppers (5×5 to 6×6 inches):
Weight: 75 to 120 grams.
Large Toppers (7×7 to 8×8 inches):
Weight: 120 to 150 grams.
The weight of the topper increases with higher hair density and longer hair lengths. For example, a medium-sized topper with 130% density and 14-inch hair may weigh around 90-100 grams.
4. Hair Length
Hair toppers are available in various lengths, depending on personal preference. Typical hair lengths include:
Short Hair:
Length: 8 to 12 inches.
Ideal for blending with short hairstyles, such as bobs or shoulder-length haircuts.
Medium Hair:
Length: 14 to 16 inches.
Blends well with medium-length hairstyles and adds natural volume at the crown.
Long Hair:
Length: 18 to 24 inches.
Suitable for those with longer hair who want full coverage and extra volume.
5. Base Material and Thickness
Hair toppers can be made from either lace or silk, with each material having different thicknesses and characteristics.
Offers a more durable and realistic scalp appearance but may feel slightly heavier than lace bases. Silk bases can last longer and are more durable for regular wear.
6. Lifespan of a Hair Topper
The lifespan of a hair topper depends on the material (human hair vs. synthetic hair), base quality, and how well it is cared for.
Human Hair Toppers:
Lifespan: 6 to 12 months with proper care.
Can be washed, styled, and colored like natural hair, which contributes to a longer lifespan. Proper maintenance (minimal heat, gentle washing, etc.) can extend the life to 1 year or more.
Synthetic Hair Toppers:
Lifespan: 3 to 6 months.
More affordable than human hair but less durable. They cannot withstand heat styling and may wear out faster with frequent use.
7. Clips and Attachment Methods
Hair toppers are secured to natural hair using clips, tape, or bonding methods. Here’s an overview of the number of clips typically used:
Small Toppers (2×3 to 4×4 inches):
3 to 4 clips: One at the front, two at the sides, and possibly one at the back for extra security.
Medium Toppers (5×5 to 6×6 inches):
4 to 5 clips: One at the front, two at the sides, and one at the back.
Large Toppers (7×7 to 8×8 inches):
5 to 6 clips: One at the front, two at the sides, one at the back, and possibly an additional clip at the middle.
Toupee clips typically range in size from 1 to 1.5 inches and should be spaced evenly for a secure fit.
8. Cost of a Hair Topper
The cost of a hair topper can vary greatly depending on the type of hair, base material, and customizations.
Synthetic Hair Toppers:
Price: $50 to $150.
Affordable option but with a shorter lifespan.
Human Hair Toppers:
Price: $200 to $1,000+ depending on the quality of hair, size, and density.
Higher quality and more customizable, often with a longer lifespan.
9. Time Required to Make a Hair Topper
If you are constructing a hair topper from scratch, here’s an estimated timeline:
Sewing Hair Wefts onto Base:
Time: 1 to 2 hours depending on size and complexity.
Proper maintenance is essential for prolonging the lifespan of a hair topper. Here’s a suggested routine:
Washing Frequency:
Wash every 2 to 4 weeks, depending on use. Avoid over-washing, as it can dry out the hair.
Product Use:
Use sulfate-free shampoo and lightweight conditioner. Avoid heavy styling products that can weigh the topper down.
Heat Styling:
If you are using human hair, minimize heat exposure. Use a heat protectant spray and avoid temperatures above 350°F (177°C).
Conclusion with Data
Base Size: 2×3 to 8×8 inches, depending on coverage.
Hair Density: 80-180%, with 100-130% being most common.
Weight: 50 to 150 grams depending on base size and density.
Hair Length: 8 to 24 inches.
Clips: 3 to 6, spaced evenly.
Cost: $50 to $1,000+, based on quality and type of hair.
Lifespan: 6-12 months for human hair, 3-6 months for synthetic hair.
Washing: Every 2-4 weeks.
Time to Make: 1.5 to 3 hours total.
These specific data points offer a thorough understanding of the measurements, specifications, and considerations needed when dealing with a hair topper, helping users select or make a product that perfectly fits their needs.
Emeda Hair is a hair topper factory specializing in the production of various types of toppers for women experiencing hair thinning or seeking additional volume. As a manufacturer based in China, Emeda Hair produces high-quality hair toppers made from both human hair and synthetic fibers. The company focuses on providing custom solutions, offering a wide range of base sizes, hair lengths, and densities to meet different customer needs.
Key features of Emeda Hair toppers include:
Base Options: Lace, silk, and mono bases are available, offering both natural scalp appearances and comfort.
Hair Quality: Emeda Hair primarily uses premium human hair, which can be washed, styled, and colored like natural hair. Synthetic hair options are also available for more affordable solutions.
Customizable Toppers: Clients can choose the hair length, density, and color to create a personalized topper that blends seamlessly with their natural hair.
Global Market: In addition to serving domestic markets, Emeda Hair exports hair toppers to customers worldwide, including Australia, the United States, and Europe.
As a factory, Emeda Hair emphasizes quality control and craftsmanship, ensuring that each hair topper is durable, comfortable, and natural-looking for long-term use.
We welcome you to experience the difference with Emeda Hair, your trusted partner in hair replacement solutions. Whether you are looking for a natural-looking topper wig or need assistance finding the perfect hair extension, Emeda Hair is here to help.